Capped Claws-Teeth Pendants
Capped Claws-Teeth Pendants
Everything is available in any gold or silver…
We do not sell animal parts.…
…only the metal caps for your teeth or claws that are legally obtained.
We can not ship or accept animals parts over International borders.
Legally supplied items from Canada can be sent to us and installed here for you.
…all others will have to apply themselves with the instructions at the bottom of the page.
There is also an option and explanation of how to send pictures or wax model of your claws or teeth, for a custom design.


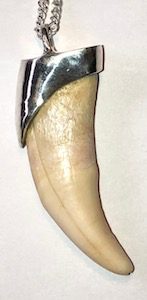
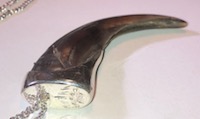
Pen9r – plain tooth or claw caps

Pen9m,n,p and q – Our first caps from the 90’s . Capped Teeth and claws, Grizzly Black bear tooth, black bear claw and wolf tooth.

Pen9v – Caps in silver with gold cross and hammered texture

Pen10a – Round caps on Grizzly Paws
Pen 9s – Bear Tooth Caps in Silver and Gold

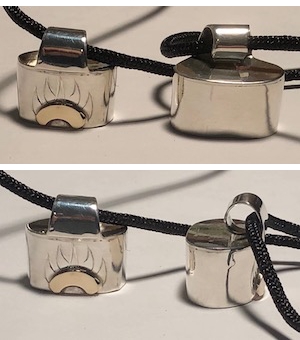
Pen9m2 – cap for Bear tooth with gold paw

Pen9t – Bear Tooth Caps in silver and gold
Pen9rc – Cast Bear and Cougar Claw with silver claw and gold cap.

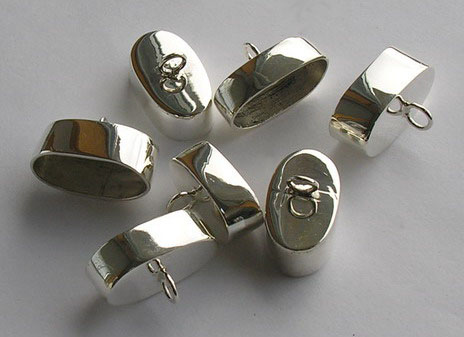
Pen9h – Plain silver constructed cap – Oval shape- no design

Pen10b – Caps for Grizzly claws
Capped Claws-Teeth Pendants – costs
The cast caps  are:
silver - $70 each
10k gold- $350 - $500
14k gold- $400 - $700

Constructed caps are:

silver - plain or engraved $70
14k paw on silver $110
14k gold - $450 - $800

Sorry, We can Not accept any Animal parts that are transferred across International Borders, so an individual applied fit is for Canadian friends only....others will have to attach the finished, buffed and detailed claw or tooth with the instructions below...Just send pictures and measurements like described below....
We do not supply or sell the claws or teeth.
Capped Claws-Teeth Pendants – What I Need for your cap…
Canada Customs frowns on sending any claws through the mail…. …SO…..You can send pictures, or if it is an unusual shape, and can’t send it to me over International Borders, then you can use the paraffin wax method.
The 2 methods , cast and constructed, can both be done.
Constructed
– Imagine a finger ring, put in a vise and squished from round to oval….now add a top cap and jump-ring for the chain. – Pics 1 and 2 below…( not necessary to have any design or ‘things’ on the side.)

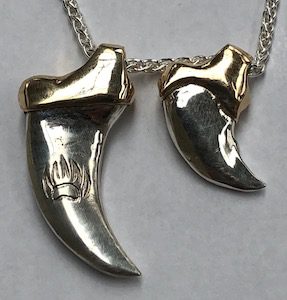
Pen9q Bear Tooth Cap and Claw Cap
Cast
– a wax mold is made and the tooth set in.
– I would carve a piece of wax or use wax sheet , ( my wax is made of %60-80 plastic and %40-%20 paraffin wax ) make it fit precisely on the tooth…./ then shape the outside to match the design or curve of the tooth….

Grizzly Cap in Wax
– To make a piece without having it in my hand requires you to do a little wax work.
– take the tooth, place a piece of cling-wrap around the tooth and dip the tip ( size of the desired cap ) into melted paraffin wax, ( picture 4 is a Saber-Tooth tigers tooth paraffin wax mold from a customer in Indiana…. picture 5 is the cleaned up cap all cast in 10k gold )
– paraffin wax can be bought at any local store …they use it for sealing home-made jam ….or… melt down a candle in a jar that is in a pot with water
– I’ll send you info on this method if you wish…
– then, send it to me and I will clean , shape and attach a jump ring…
– I’ll send it to my casting guy and then detail it when it returns…( pics 5-6 and 7 )
Costs for the plain constructed cap would be $60 -$80 for silver and maybe $2-400 for gold , ( depends on size etc ).
Cost of the Cast Cap depends on size , material and is in my caster’s hands…so…from $80 to $500 ( silver / gold ? )

Wax and Gold Saber-tooth Tigers Cap – Silver Shark Tooth Cap
OR….
Take 3 IN FOCUS pictures next to a ruler and send me 3 pictures of the claw or tooth that show the three dimensions…height, width and depth.
HOW TO SET THE CAP ON A CLAW

-
- Caps will be rough on the inside
- Put masking tape or something around the cap to protect it from scratches.
- Trim the claw , (File, belt-sander… ) to the 3 dimensions given for your cap, ( as seen below).
- (NO GLUE YET )…Make sure it fits….. claw corners are rounded like the cap and tooth and may have to be squished to get the cap on.
- A little loose is OK but test the fit …adjustments later.
Test run
for fit…. you will only have 5 minutes before the epoxy starts to set !
- Hammer , ( or rubber mallet ) and wooden dowel or leather piece ( from belt ? shoe ? ) and wooden piece as a surface, tooth picks (stir stick ) for stirring the epoxy, razor blade , exacto or sharp knife
- Drill small holes, ( 1/16″ or so ) at angles on top and inside ( 2nd pictures).
- Work the mixed epoxy ( 2 part, 5 minute), into the holes , top of claw, and inside cap.
- Put the cap quickly on the claw and close any gaps. or loose fitted sides tight with a rubber mallet, wooden hammer, and block of wood, or, tap on a leather strap to close it, or vice with wooden jaws……anything except smacking it with metal ( hammer face ).
- Squish / hammer the sides in tight.
- Push epoxy into any gaps.
- The Timing will change between each application depending on the amount of hardener used, or temperature, but, after 10 minutes the epoxy may be cut.
- Cut off excess glue around the cap’s edge.
- Your biggest problem is buffing the cap after glue is completely dry…. since you may not have the tools that I use be extra cautious not to scratch the cap when you take off the excess epoxy. ( that’s why you wrapped it in masking tape )
- NEXT DAY , take off the tape and clean glue with methyl alcohol ( hydrate ).

How to set tooth and claw caps
